
Tiandy · Guide
Activating an IP camera
Password on the camera's web interface, or activation from the recorder.

Step 1 of 5
The camera's address in the browser
The manufacturer’s guide shown here uses 192.168.1.2 as the camera’s default IP address; check your own model’s quick start guide. Enter the address in the browser’s address bar and the camera’s login page appears. The computer must be in the same address range (for example 192.168.1.x).
Step 2 of 5
Setting a new password
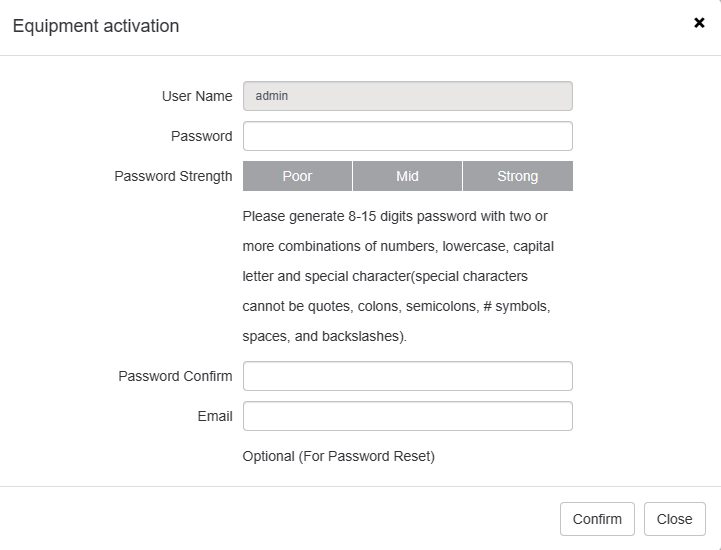
Before first use the camera has to be activated. Enter a new password following the rule shown in the window, repeat it and click save.
Step 3 of 5
Logging in with the new password
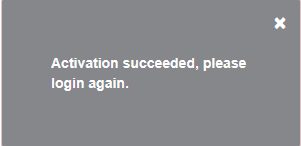
At the "Activation succeeded" message click OK. On the login page, the user name admin and the new password take you to the camera's live view.
Step 4 of 5
Installing the plug-in
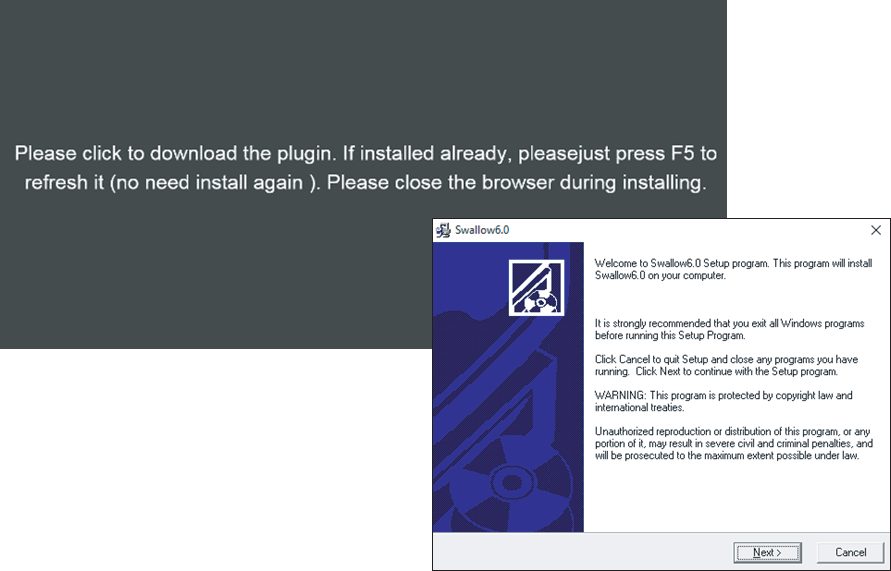
If the camera’s web interface asks for a plug-in to show live view, install it as the pop-up message says, then reopen the browser and log in.
Step 5 of 5
Activation from the recorder
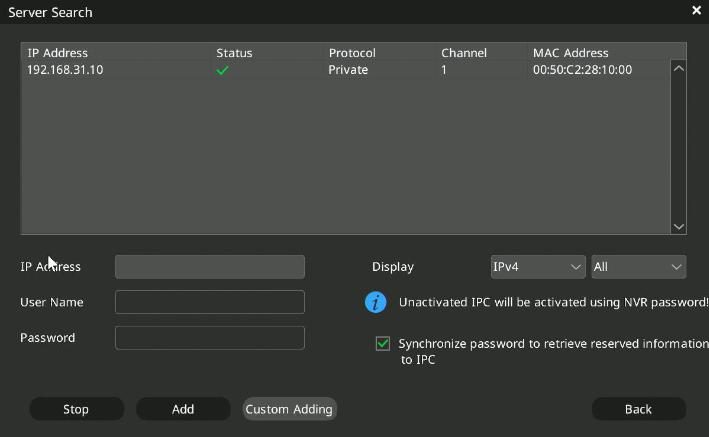
If the camera goes on a Tiandy recorder, you can skip the browser step: when adding an inactive camera, the recorder activates it with its own password. With the Synchronize password box ticked, the reserved phone number and security questions are passed on to the camera as well.
Good to know: The camera does not accept a weak password: the bar next to the field shows the password strength as you type.
Source: IP camera quick start guide, "Device Activation"; NVR user manual (local interface), section 4.4.1. Screenshots from the manufacturer's manual.
IP camera: quick start guide PDF · in English · 25 pages · 12.7 MB
More guides
Need help with the installation?
Send the exact camera and recorder models, the problem and what you have already tried. We reply by email. Do not send passwords.
On working days we reply the same day.
Write a message