
Tiandy · Guide
Add the camera to the recorder
Network search, changing the IP address and manual adding.
Step 1 of 6
Quick route from the live view
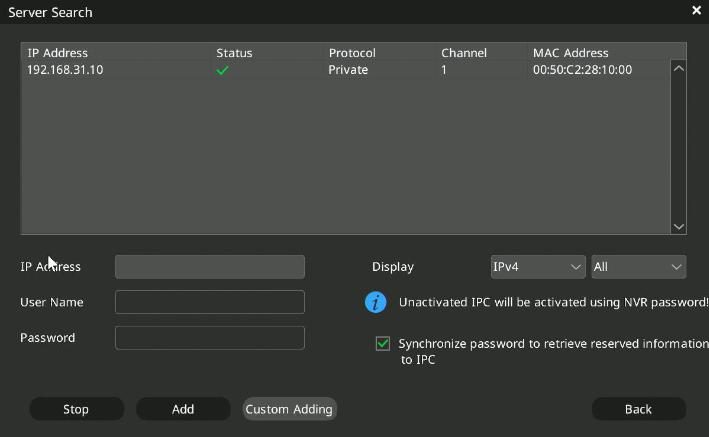
On the live view, click an empty channel: the "+" sign opens the search window. Select the camera and click Add, or double-click its row.
Step 2 of 6
Channel configuration
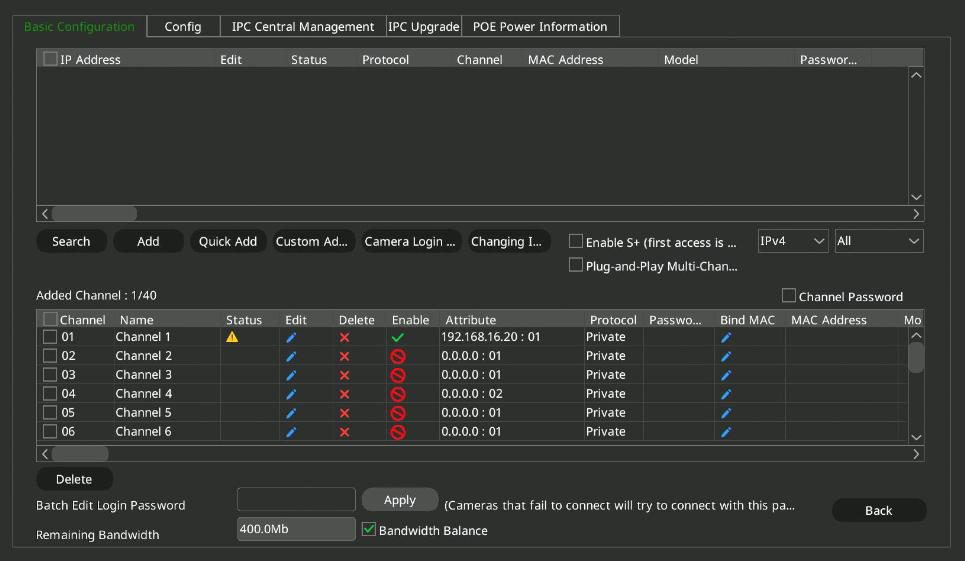
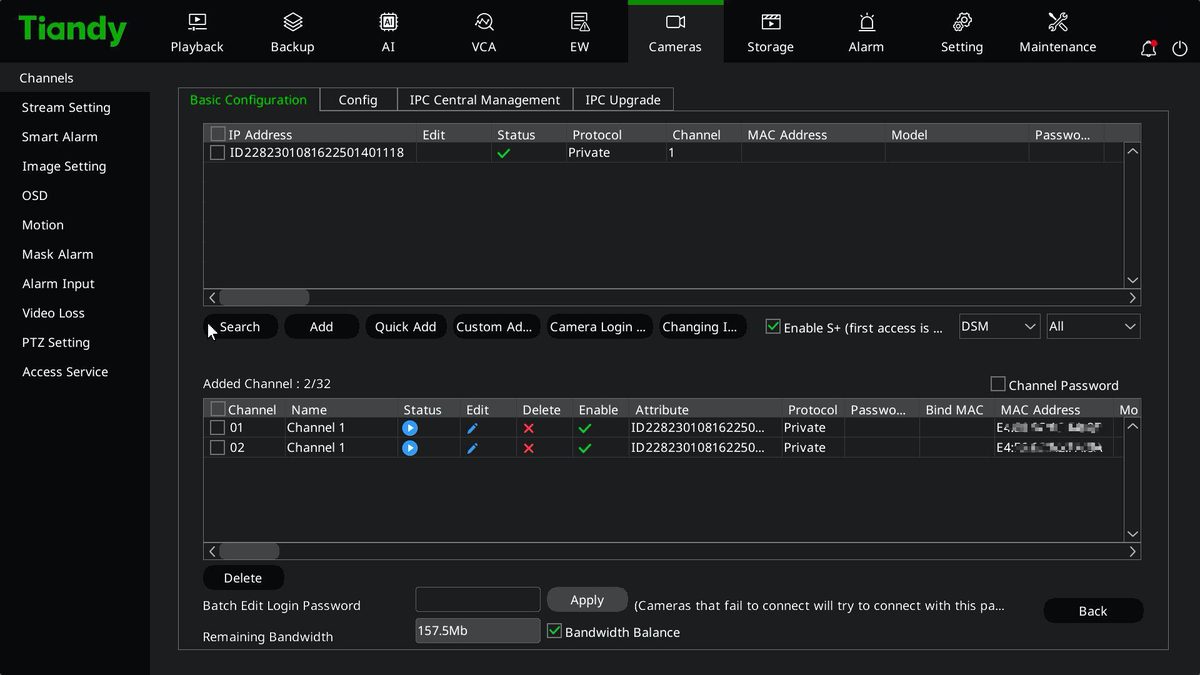
For several cameras, open the main menu: Main Menu → Channel Management → Channel Configuration, and choose the Basic Configuration tab.
Step 3 of 6
Search and add
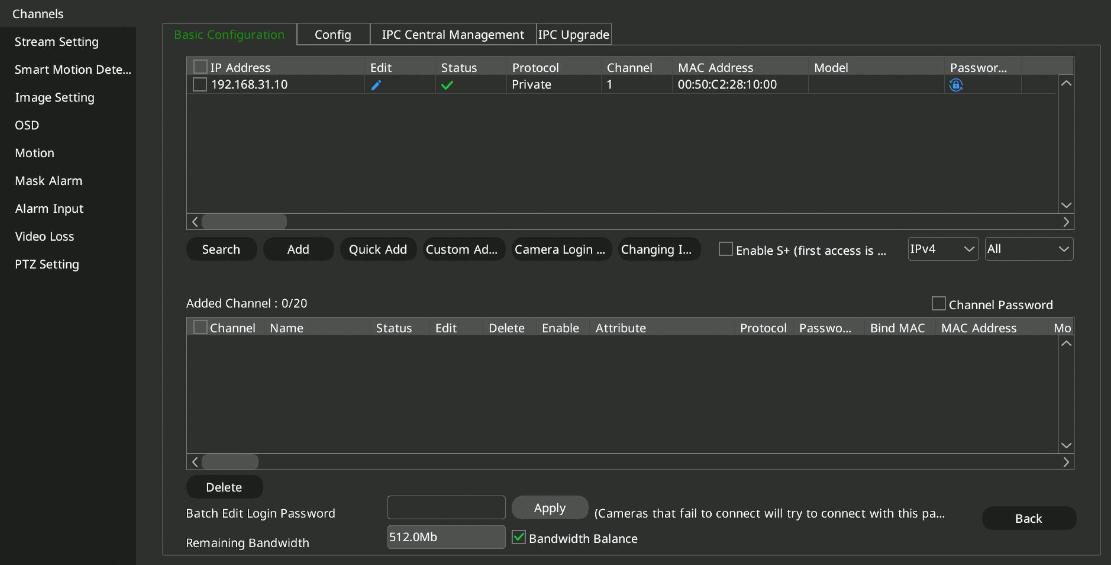
Search lists the devices on the network, sorted by IP address. Select the cameras and click Add: the recorder puts them on free channels. You can select several cameras at once.
Step 4 of 6
Changing the IP address
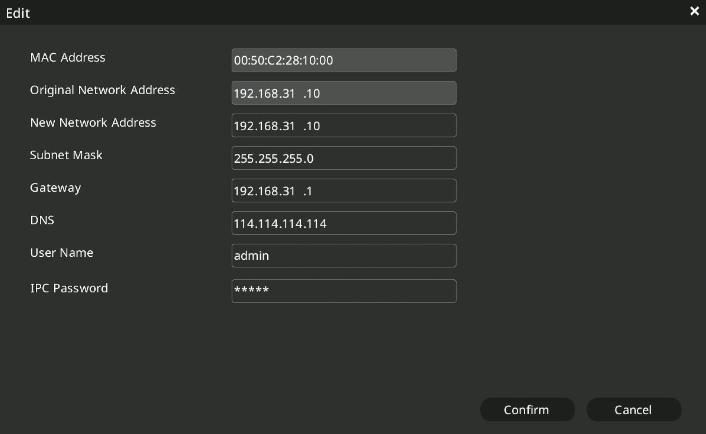
If the camera's address does not fit your network, use the edit icon in the search results to enter a new IP address, mask and gateway. You need the camera's password for the change.
Step 5 of 6
Adding a camera manually
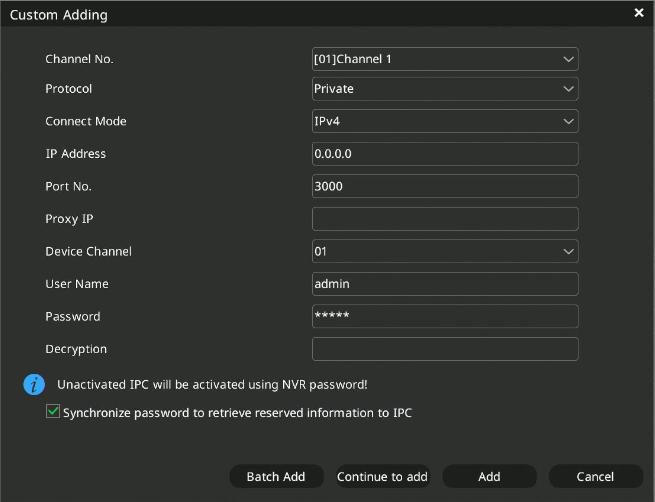
If the camera does not show up in the search, or its port, user name or password differs, enter the IP address, port, user name and password in the Custom Adding window.
Step 6 of 6
Checking the connection
Added cameras appear in the Added Devices list, where the status column shows whether the connection is up. If it is not, check the network connection and the camera's login details.
Good to know: In the Camera login password field you can set a common camera password. If you leave it empty, the recorder tries its own login password.
Source: NVR user manual (local interface), section 4.4.1; NVR quick start guide, point 7. Screenshots from the manufacturer's manual.
Network video recorder (NVR): user manual for the local interface PDF · in English · 278 pages · 12.6 MB
More guides
Need help with the installation?
Send the exact camera and recorder models, the problem and what you have already tried. We reply by email. Do not send passwords.
On working days we reply the same day.
Write a message