
Tiandy · Guide
First setup of the recorder with the wizard
Activation, time, network, hard disk and cameras at first start.
Step 1 of 11
Setting the admin password
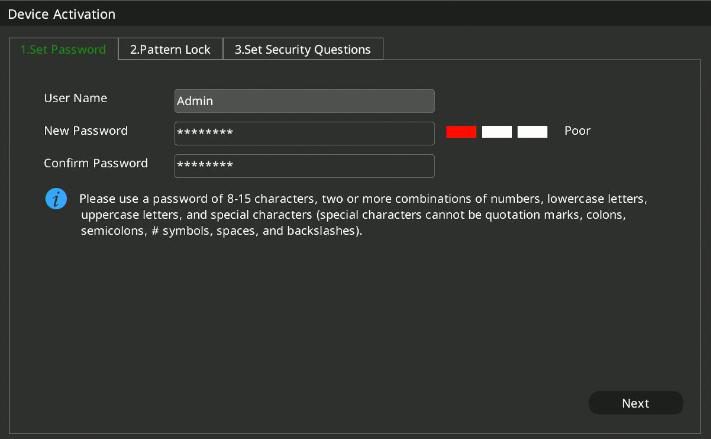
At first start the recorder asks for a new password; there is no factory password. The password is 8 to 15 characters long and contains at least two kinds of characters: lowercase, uppercase, digits or symbols. It cannot contain quotation marks, colons, semicolons, the # sign, spaces or backslashes. Enter it twice, then click Next.
Step 2 of 11
Unlock pattern
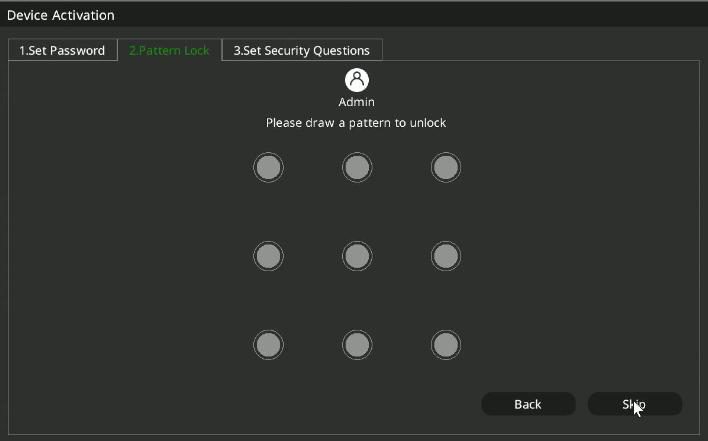
Here you can draw an unlock pattern: connect at least four points, the same way twice in a row. Only the admin user can log in with the pattern. Skip lets you leave this step out.
Step 3 of 11
Phone number and security questions
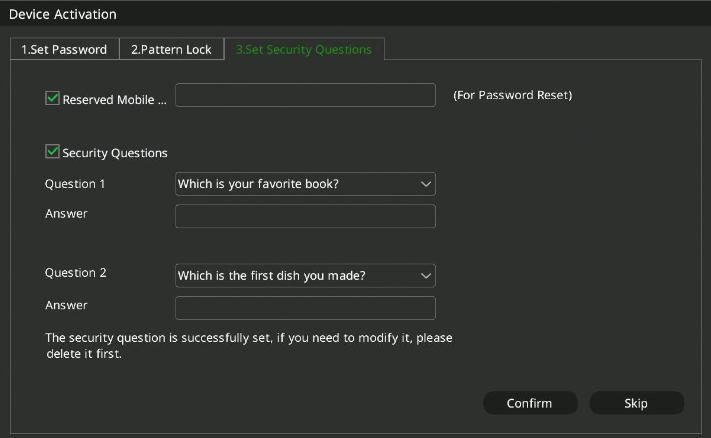
Enter a reserved phone number and choose two security questions with your answers. If you forget the password later, you can reset it with these. You can skip this step, but it is worth filling in.
Step 4 of 11
Monitor resolution
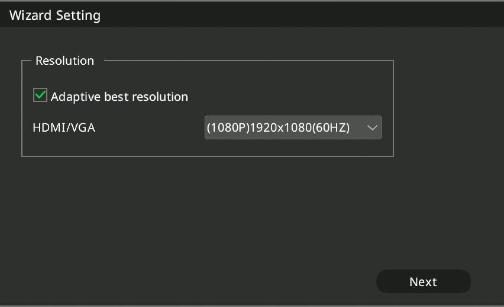
The first window of the wizard asks for the output resolution. With Adaptive best resolution on, it picks the resolution that suits the connected monitor. Then click Next.
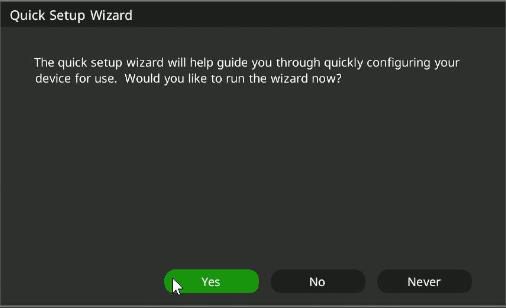
Step 5 of 11
Starting the wizard
Yes takes you through the setup, No skips it for now, and with Never the wizard does not appear at the next start either.
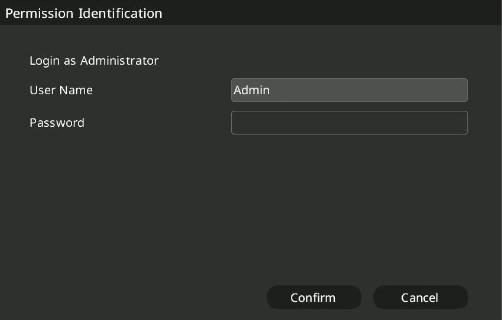
Step 6 of 11
Logging in as admin
The user name is admin, and the password is the one you set in the first step. After five failed attempts in a row the recorder locks login for 5 minutes.
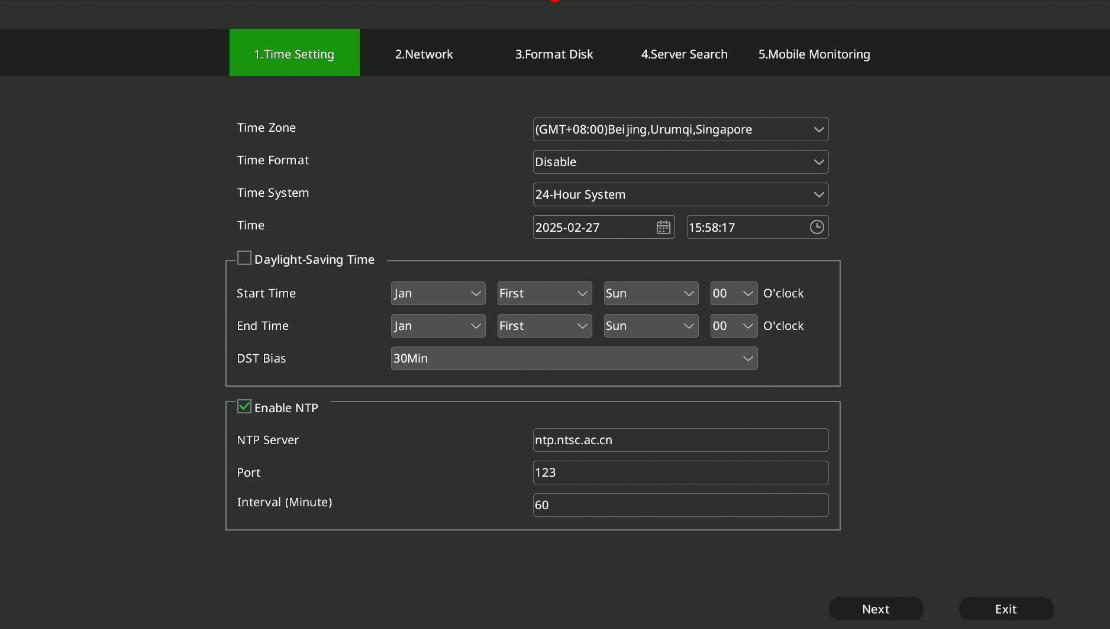
Step 7 of 11
Time and time zone
Set the time zone (GMT+01:00 in Hungary), the date and time format and the current time, then click Apply. You can also turn on NTP here so that the recorder sets its clock from a time server.
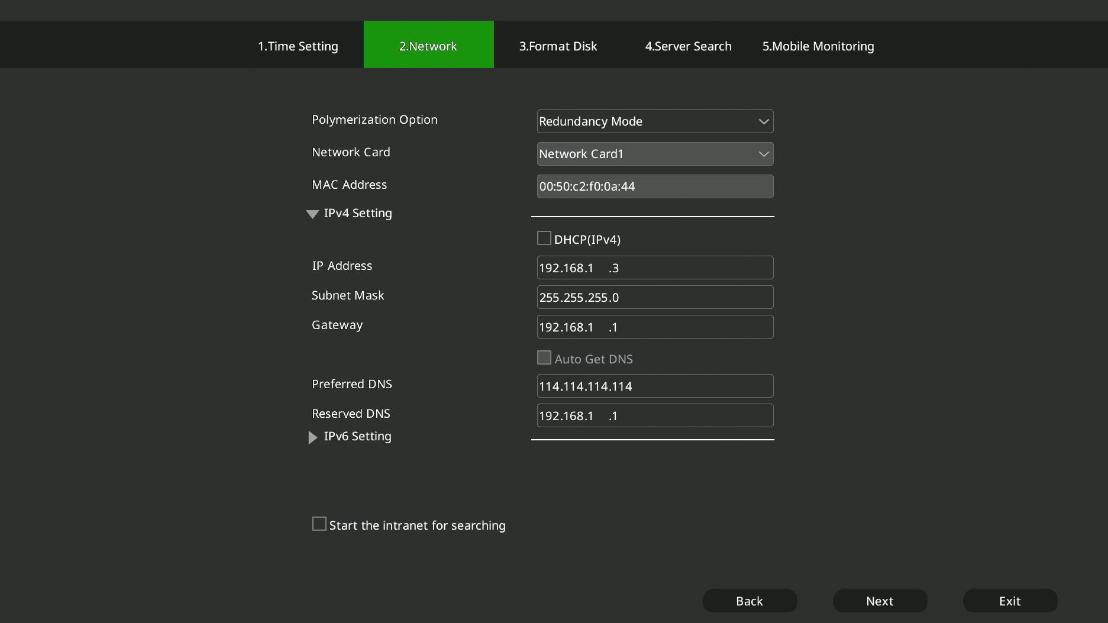
Step 8 of 11
Network
Enter the recorder's IP address, subnet mask, gateway and DNS server to match your local network. With a fixed IP address the recorder is always reachable at the same address.
Step 9 of 11
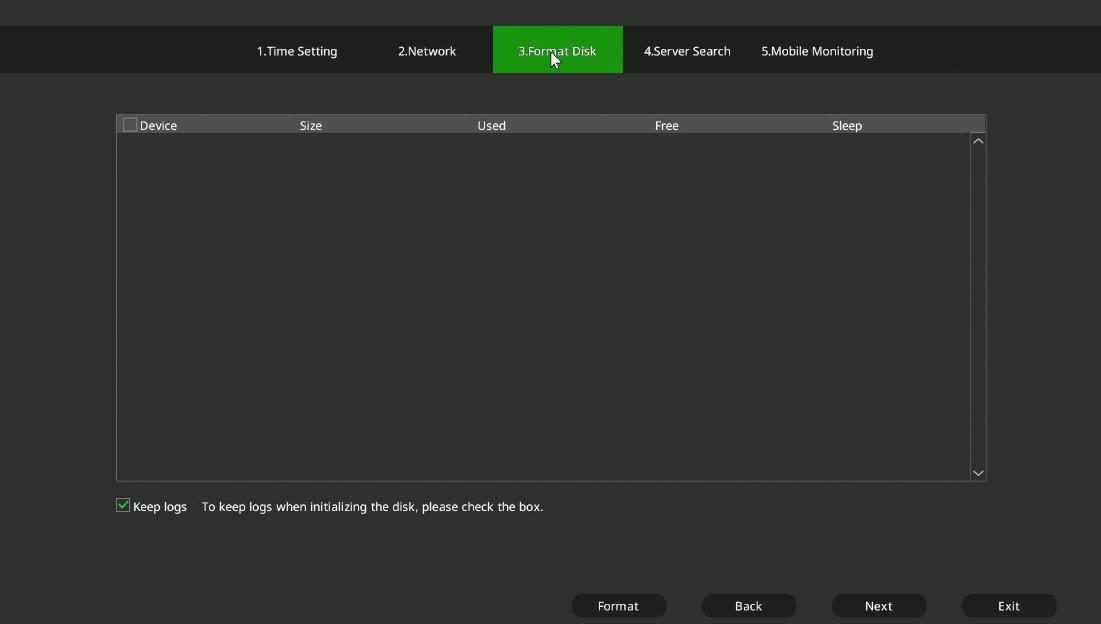
Formatting the hard disk
Select the hard disk and click Initialization. Without formatting, the recorder does not record.
Step 10 of 11
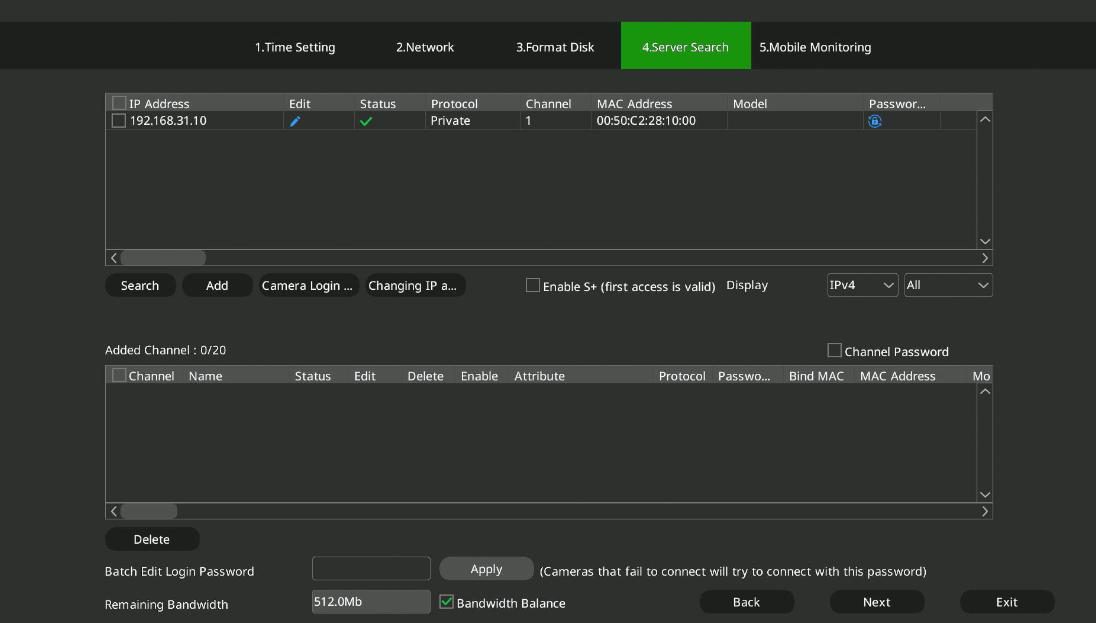
Finding cameras
Search finds the cameras on the network. Add puts the selected ones on the recorder's free channels.
Step 11 of 11
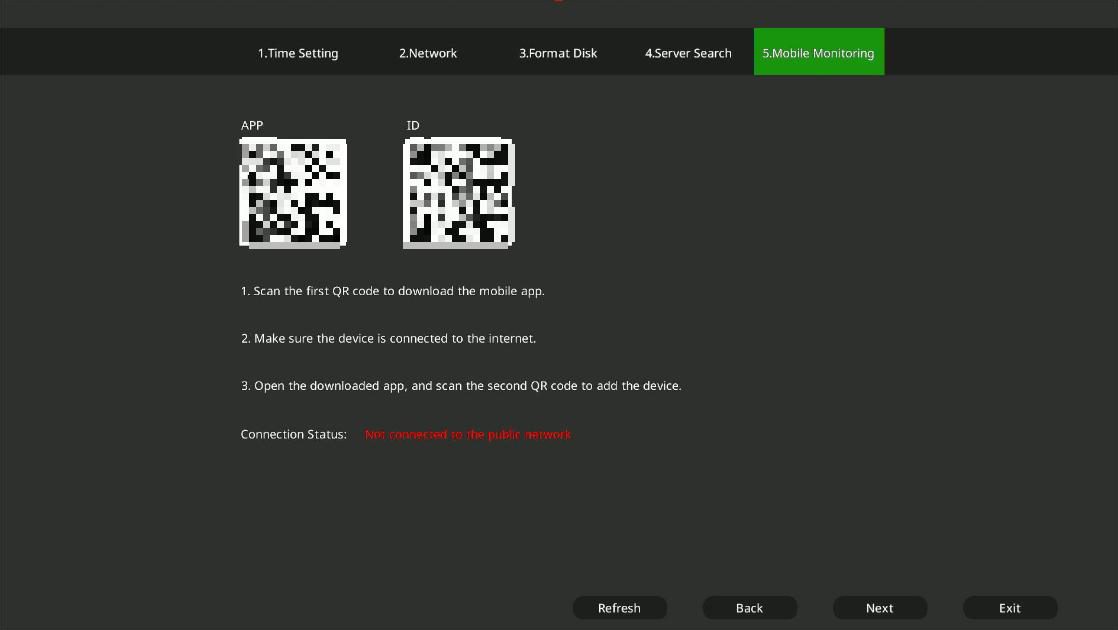
Mobile access
Scan the first QR code to download the EasyLive Plus app and the second to add the recorder; the recorder needs internet access for this. If an unformatted hard disk is left at the end of the wizard, Execute formats them one by one.
Good to know: You can leave the wizard at any step with Exit; all settings are also available later in the main menu.
Source: NVR user manual (local interface), sections 4.1 to 4.3. Screenshots from the manufacturer's manual.
Network video recorder (NVR): user manual for the local interface PDF · in English · 278 pages · 12.6 MB
More guides
Need help with the installation?
Send the exact camera and recorder models, the problem and what you have already tried. We reply by email. Do not send passwords.
On working days we reply the same day.
Write a message